

The Post and Photos within may contain Amazon or other affiliate links. If you purchase using links in this post I do earn a small commission but without additional charge to you. Thank you for your support!
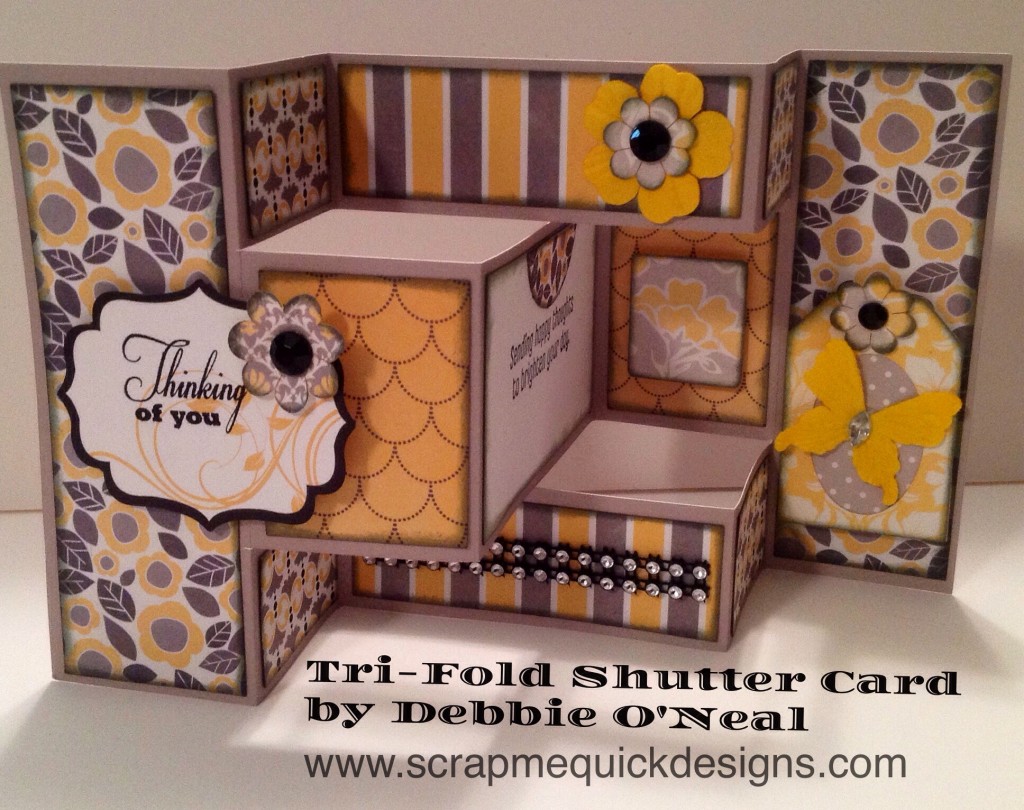
These unusual Tri-Fold shaped cards are always a big hit. I had fun creating one …Okay, I actually made several because they were so much fun… I wanted to share the easy directions with you all today.
Supplies Needed:
1 Sheet of 12X12 cardstock (to use as base of card)
4 Sheets of different patterned papers ( I used 6X6 paper pad)
1 Sheet of white cardstock (to use for sentiment message)
Adhesive of choice
Basic Tools: Ruler, Trimmer, Score Tool/Board **(see Cricut Explore)
Optional: Ink, rhinestone, ribbon, flowers, foam pop dots, stamp with sentiment
** If you have the Cricut Explore, I have created a Design Space File to share with you that already has the cuts for base and patterned paper pieces. I have resized the file slightly from the written directions so that the base will fit on the Cricut Mat to be able to cut from a 12X12 piece of paper. You will need to have the Cricut Score Tool to be able to use this file. GET THE FILE HERE: https://www.cricut.com/design/#/canvas/project/16824844
Note: Once you click on the file, it will open the file on your Cricut Design Space. Then you need to save the file to your Design Space folder. And begin creating your own card including the layers.
Directions for Card Base:
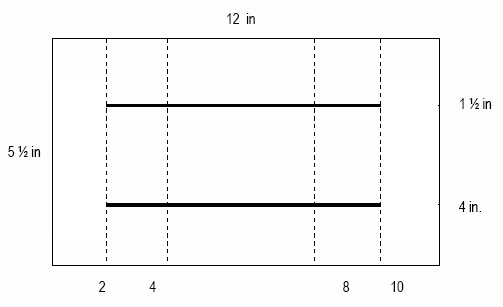
1. Using the 12X12 cardstock you selected for the base, cut it to 5 ½ X 12
2. Place the cut piece on scoreboard with the 12” across top of scoreboard
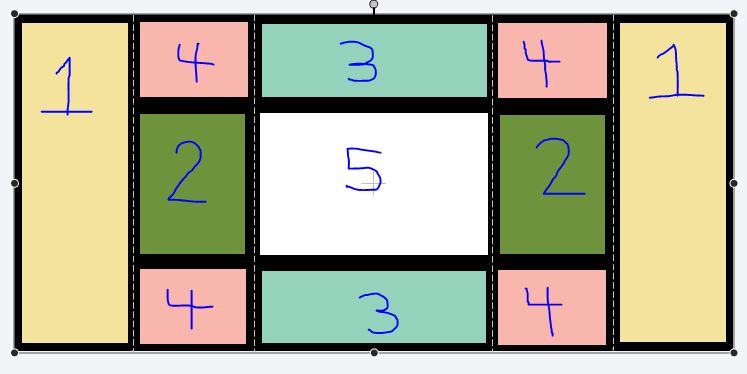
3. Score at 2”, 4” and then at 8” and 10 “ (the dotted lines in the diagram)
4. Place the scored sheet on paper trimmer, rotating so the 5 1/2” piece is across the top of paper trimmer. Measure 1 1/2” from the left side of the paper and cut between the top
score line down to the bottom score line. (cut line is the dark line in diagram)
5. Move the cut paper over to the left and cut again at 4 “ between the top score line down
to the bottom score line.
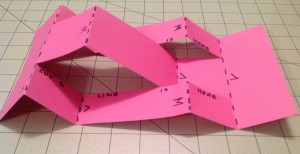
Next, Fold the card on the score line pieces as in the first photo below using the (M)ountain and (V)alley Folds to complete the base project. Tip: Start by folding the two outside strips first and then the larger center piece is folded in the opposite of the side pieces.
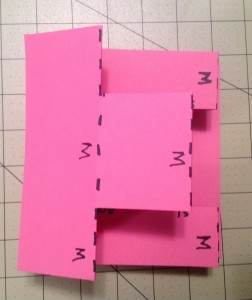
Then fold over towards the right to complete the card formation as in second photo to form the card.
Directions for Decorative Pieces:
1. Cut all pieces to adhere to base as follows:
Panel 1 – Cut (2) 1 3/4” X 5 1/4” out of same patterned paper
Panel 2 – Cut (2) 1 3/4” X 2 1/4” out of same patterned paper
Panel 3 – Cut (2) 3 3/4” X 1 1/4” out of same patterned paper
Panel 4 – Cut (4) 1 3/4” X 1 1/4” out of same patterend paper
Panel 5 – Cut (1) 3 3/4” X 2 1/4” out of white cardstock
2. Die cut a shape of your choice about 1 1/2” X 2” or larger to use as card sentiment on front panel of card. (I used a die cut label shape from CTMH Art Philosophy Cricut Cartridge).
3. Adhere the patterned paper and cardstock pieces to the folded cardbase as shown in the diagram. Optional: Ink edges of paper before applying to the base.
4. Stamp the sentiment of your choice on the die cut label for front panel and also on inside panel 5 piece.
5. Now is the fun part, decorate your card with die cut embellishments of your choice. (I die cut some flowers out of matching patterened paper and layered them. Plus I used some store bought bling and flowers to complete the look. I also added some more dimension to my card by using foam pop dots to adhere the front sentiment and other inside embellishments)
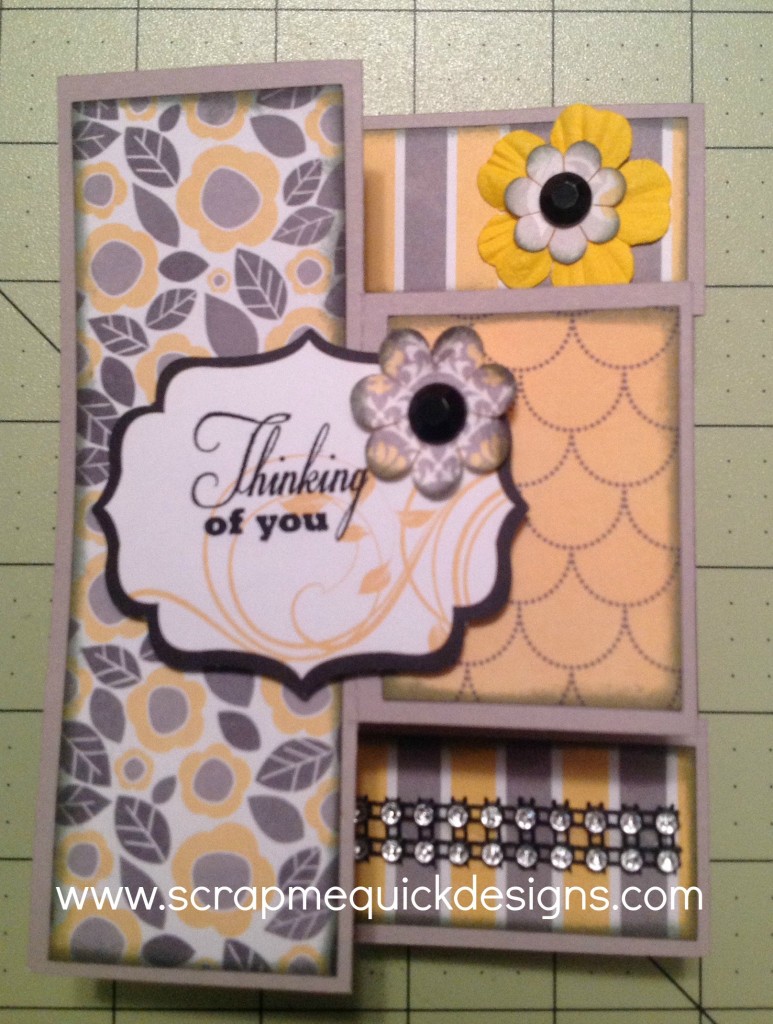
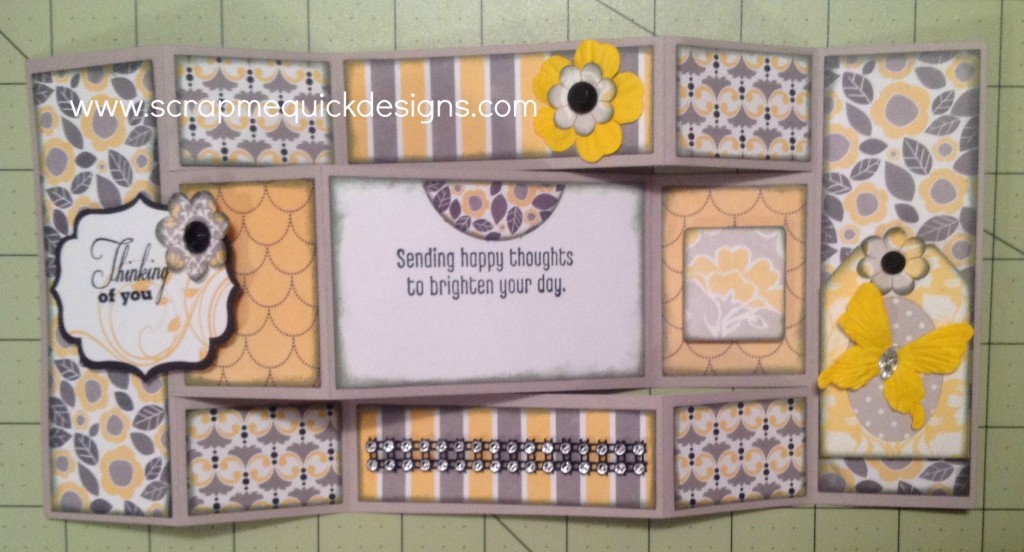
GET CREATIVE WHEN YOU DECORATE. Add die cut shapes to the front and inside of your choice to add to the theme of your card. I also added some bling to mine…oh, surprise !

Debbie your instructions are wonderful. Thank you for sharing. I will be trying my first trifold card soon.
Sure would love to have this file for Cricut craft room or svg file. Any possibility? Tx for considering.
Just seeing this today, April 21, 2015. Love the card and the colors you used.
Thanks Darleen. Sweet of you to say !
I’m a new Cricut Explore Air user and have been wanting to make cards like this. The pattern for Cricut Design Space was *greatly* appreciated and your instructions were very easy to follow. Other than my pen being too thick for the font I chose (I printed a birthday sentiment on the center square), I think it looks wonderful. Thank you SO much!
You are so welcome Kistel – Its a great pattern to make any type of card for any occassion. Enjoy ! Debbie
OMGoodness thank you so much for being willing to share this! I love it. I just got a Cricut and this is my first project. Is there an envelope pattern anywhere? 🙂
Thank you Amy. Glad you enjoyed the card. I do not have an envelop file for that card but it will fit in a standard A2 size envelope. Debbie
Simple to prepare, beautiful to give
thank you
I guess I’m a little late to the party. I just found your tutorial on the tri-fold shutter card. I wasn’t able to open it in design space, It wouldn’t work, but I was able to follow your great instructions and just made my sister a
beautiful birthday card. Thank you so much for sharing!
HI Judy – Happy to hear you were able to create a beatutiful card. Sorry if you had trouble with the file. I need to take a look at the file again and see what I need to do to get it working in Design Space again. Debbie