

The Post and Photos within may contain Amazon or other affiliate links. If you purchase using links in this post I do earn a small commission but without additional charge to you. Thank you for your support!
H A P P Y 4 TH OF J U L Y Everyone !
I wanted to make a matching envelop to go with the 4th of July Birthday Card I made for my dad. You can check out that card HERE.
You may have noticed that the card I made welding two die cut images together to create the card base was an unusual shape, right? Well what envelop fits those unusual shaped cards? You guessed it, you need to be able to make your own custom envelopes.
There are many different types of products that allow you to make your own envelopes using paper and a scoring board, but my favorite way is to use the We R Memory Keepers Envelope Punch Board.
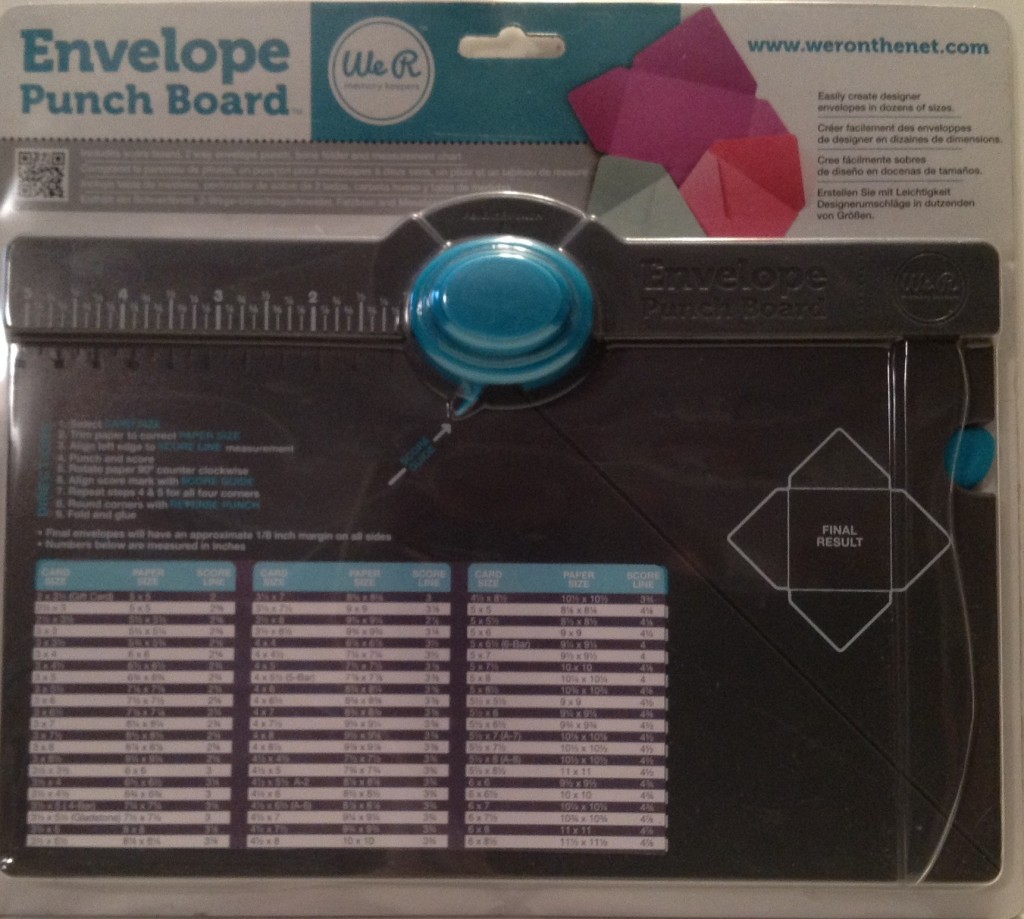
You can watch a video on the We R Memory Keepers website HERE to see how it to use it.
It’s so simple to use. You just measure your card shape, find the dimensions on the handy chart found on the front of the board, cut your paper to that dimension and score at the recommended score marks. You can even use the reverse side punch built in to the score board to round the corners of your envelopes to make them look even more professional. How dang cool is that?
So I made my envelope using a 9 1/2 X 9 1/2 inch paper, scored at 4 3/4 to get a 6X6 envelope to fit my custom made die cut card.
insert photo of plain envelope
Next, I wanted to jazz it up some so Washi Tape to the rescue. Don’t know about amazing Washi Tape, well check out my post (Insert Here) where I previously talked about washi tape.
Using a grid mat and selecting a red and a blue washi tape from my washi stash, I laid out stripes on my envelop to create a red/white/blue pattern.
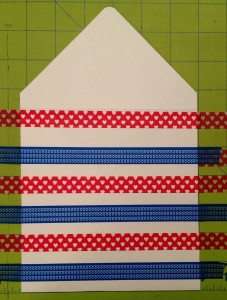
Trim off the edges of the washi tape around the edge of your card for a finished look.
Next, I used my Silhouette Cameo and cut out the letters to spell Dad out of glitter paper and adhered to the front.
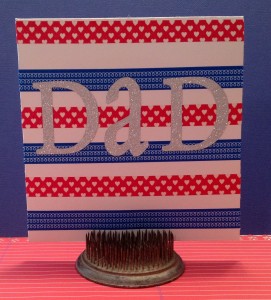
and waaalah ! I have a fun custom made envelope to match the 4th of July Birthday Card.
You could use this Terrific Thursday Technique anytime you wanted to jazz up a special card for someone. And while you are at it, actually use up some of that Washi stash I know you must have 🙂

Love how you used washi tape to make a great envelope! I don’t have the envelope punch board but my sister has one and loves it. Guess it goes on my wish list!! TFS
So we can buy more! I like it! I finally organized my washi tape in a drawer by creating dividers with cardstock and taping (with washi, of course) the dividers to the drawer sides. It was overflowing the clear plastic container, and now it’s easier to access, too. Hopefully it will help me to use up my stash!
Great tip. Always looking for more ideas for using washi tape and I just found a storage container that works really well for me to store all my washi tape it is a drawer for Kerig coffee pods http://www.amazon.com/Keurig-Storage-Drawer-Coffee-Holder/dp/B004P4TL8E/ref=sr_1_1?ie=UTF8&qid=1373110360&sr=8-1&keywords=Coffee+Pod+Drawer+Holder. Check it out…very cool design fits tape perfectly (and you can fit way too much in ;o) I also have some twine on rolls in mine too!
I still have not bought any washi tape. It’s coming though…I can feel it!