

The Post and Photos within may contain Amazon or other affiliate links. If you purchase using links in this post I do earn a small commission but without additional charge to you. Thank you for your support!
You’ve waited all year for the family beach trip. Everyone is excited to go ! But you are already dreading the inevitable “No that’s Mine !” from the kiddos, right ?
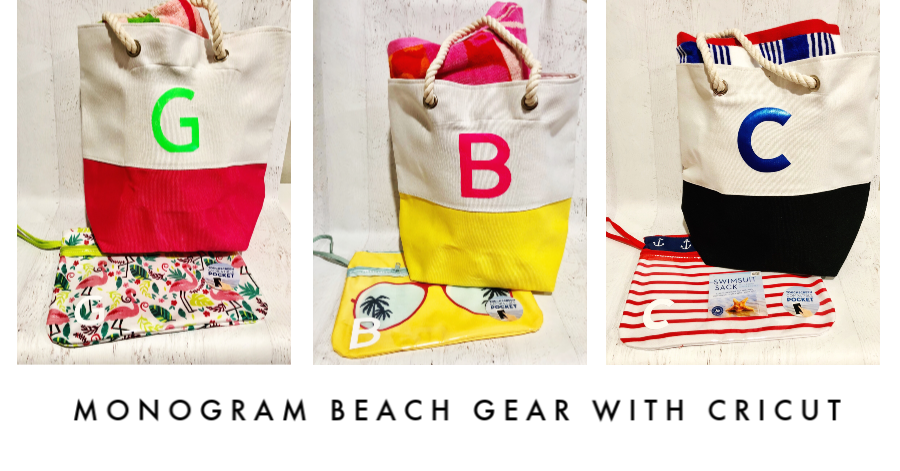
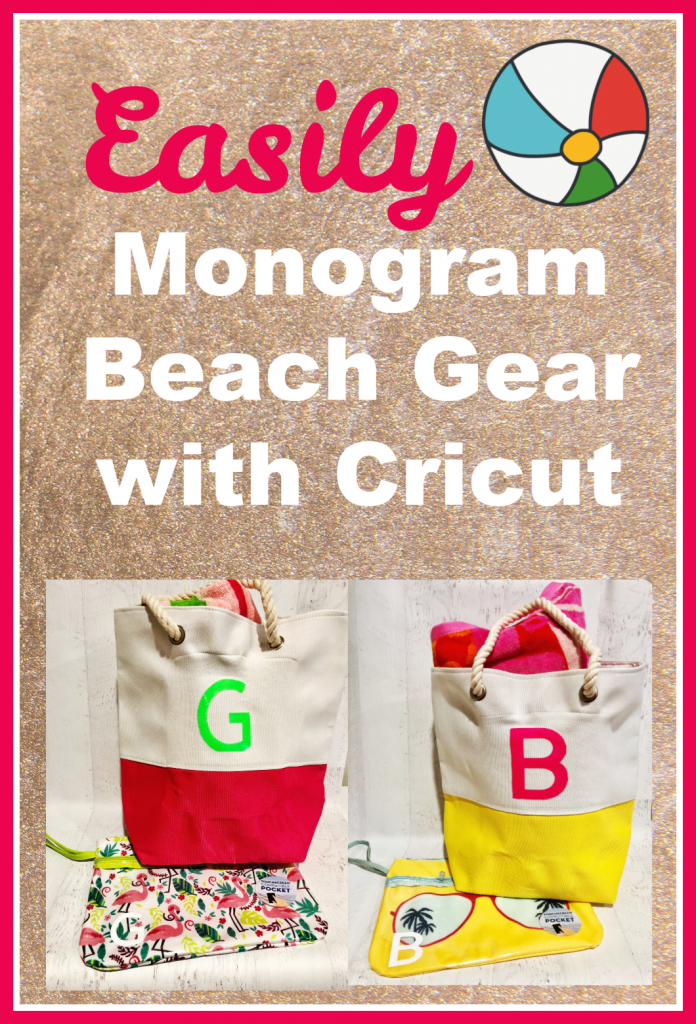
Well how about changing that this year with the help of your Cricut machine. Take a few minutes to Monogram Beach Gear so there is NO question over what belongs to whom. It’s super easy.
Let me share with you how in just a few simple steps we can restore YOUR excitement over the family beach trip. Are you ready for cool ocean breezes in your hair and warm sand on your toes and a much more tranquil vacation ?
THIS IS A TWO-PART SERIES. In this first post, you will learn how to use Cricut Everyday Iron-on with your beach gear. In the second post, you will learn how to use the Cricut Permanent Vinyl on your beach gear. Enjoy and more importantly, HAVE FUN AT THE BEACH !
SUPPLIES NEEDED:
In addition to your beach gear, you will need the following Cricut items:
-
- Cricut Explore or Cricut Maker
- Design Space software (free to use)
- Everyday Iron-On
- Easy Press or household iron
- Cricut Easy Press Mat or folded towel
- Weeding Tool
- Permanent Vinyl
- Transfer Tape
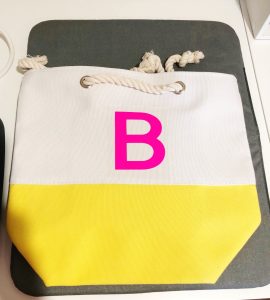
BEACH BAG WITH CRICUT IRON-ON
I recommend the Cricut Everyday Iron-On be used. It can be applied to canvas tote bags, towels, coverups etc. perfect for taking to the beach. It comes in a large variety of colors too.

HEAT SETTING GUIDELINES
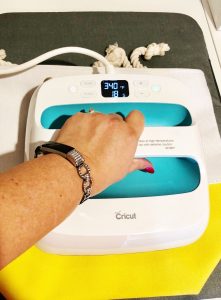
The best way to adhere Cricut Everyday Iron-On to your project is using the Cricut Easy Press. It has a consistent heat plate designed specifically for adhering iron-on vinyl for best results. In this tutorial, I will using the Cricut Easy Press.
Tip: There is a Cricut Heat Guide you can check to set your temperature and time when using the Cricut Easy Press to apply the any of the Cricut Iron-On Types to help ensure your success every time.
You can also apply Cricut Everyday Iron on Vinyl using a household iron (dry, no water). To find directions on how to use the household iron, please go to this Cricut link: Everyday Iron ON Cutting and Application Instructions for Household Irons.
CUTTING THE IRON-ON
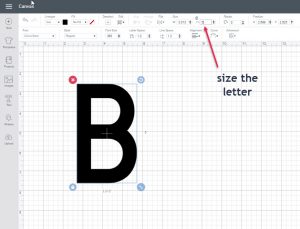
Step 1. Select and Size Your Monogram Letter in Design Space
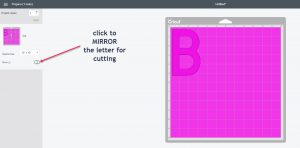
Step 2. Mirror Your Monogram Letter Prior to Cutting
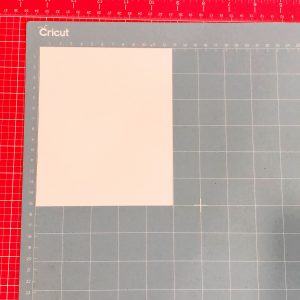
Step 3. Adhere the Cricut Everyday Iron-On with color face down (clear plastic liner side) on the Cricut Cut Mat. I prefer to use the Light Grip (blue) mat.
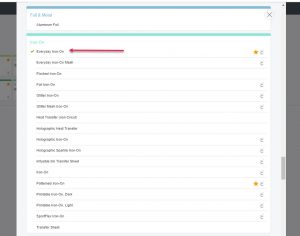
Step 5. Be sure and select the Cricut Everyday Iron-On type for the Cut Setting in Cricut Design Space. Then continue to Cut.
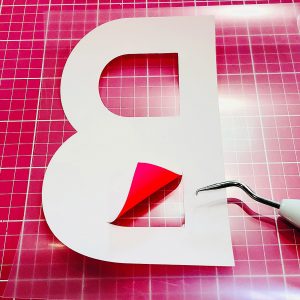
Step 6: Once your Cricut has cut out the Cricut Everyday Iron-On, remove from Mat. Trim about 1/4 inch around the monogram leaving it on the sticky sheet which is the liner.
Next, begin to weed away the part of the Monogram image you will not be using. It is handy to do this with a Cricut Weeding Tool.
ADHERING THE IRON-ON
Step 7. Place a Cricut Easy Press Mat or a folded towel on a hard surface like a desktop. Then place canvas tote bag on top of that. Next, either place another Cricut Easy Press Mat inside the tote OR a teflon protective sheet. Most importantly, do NOT skip this step.
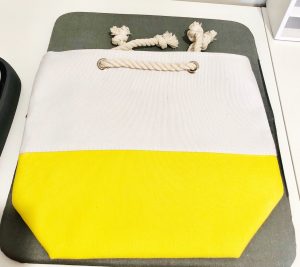
Step 8. Center the cut Cricut Everyday Iron-On on the tote bag with the color facing up. There is a clear liner, eave that on for now.
Step 9. Heat up the Cricut Easy Press to 340 degrees. Directly place it over the Cricut Everyday Iron On Vinyl, making sure to avoid contact with any seams. Heat for 30 seconds. Then remove the Cricut Easy Press and return to the base.
Step 10. Allow the Cricut Everyday Iron On to cool down to touch, then remove the clear liner. After that the tote bag is ready to be stuffed full of Beach goodies !
You can use this same Cricut Everyday Iron-on technique to towels, cover ups and more. Just be sure and select the right heat setting and time for the base material you are using.
In addition, follow this LINK to PART 2 of how to apply Cricut Permanent Adhesive Vinyl to Swim Bags, Beach Balls, Buckets and more to round out your Monogram Beach Gear.
Hey, don’t forget to PIN THIS so you have it handy
If you make a project, I’d love to see it! Please share in our Facebook Group Community where you will find others sharing their projects, tips and inspiration.