The Post and Photos within may contain Amazon or other affiliate links. If you purchase using links in this post I do earn a small commission but without additional charge to you. Thank you for your support!
Die Cuts are great for making mini albums to show off a special event or even every day moments. They make great gifts or even a little coffee table book to leave out to share photos with your family and visitors. You can find some die cut images that are specifically made to make a mini album. Today I wanted to show you how easy it is to put together a mini album and your favorite scrapbook collection pack of papers and embellishments using a die cut mini album.
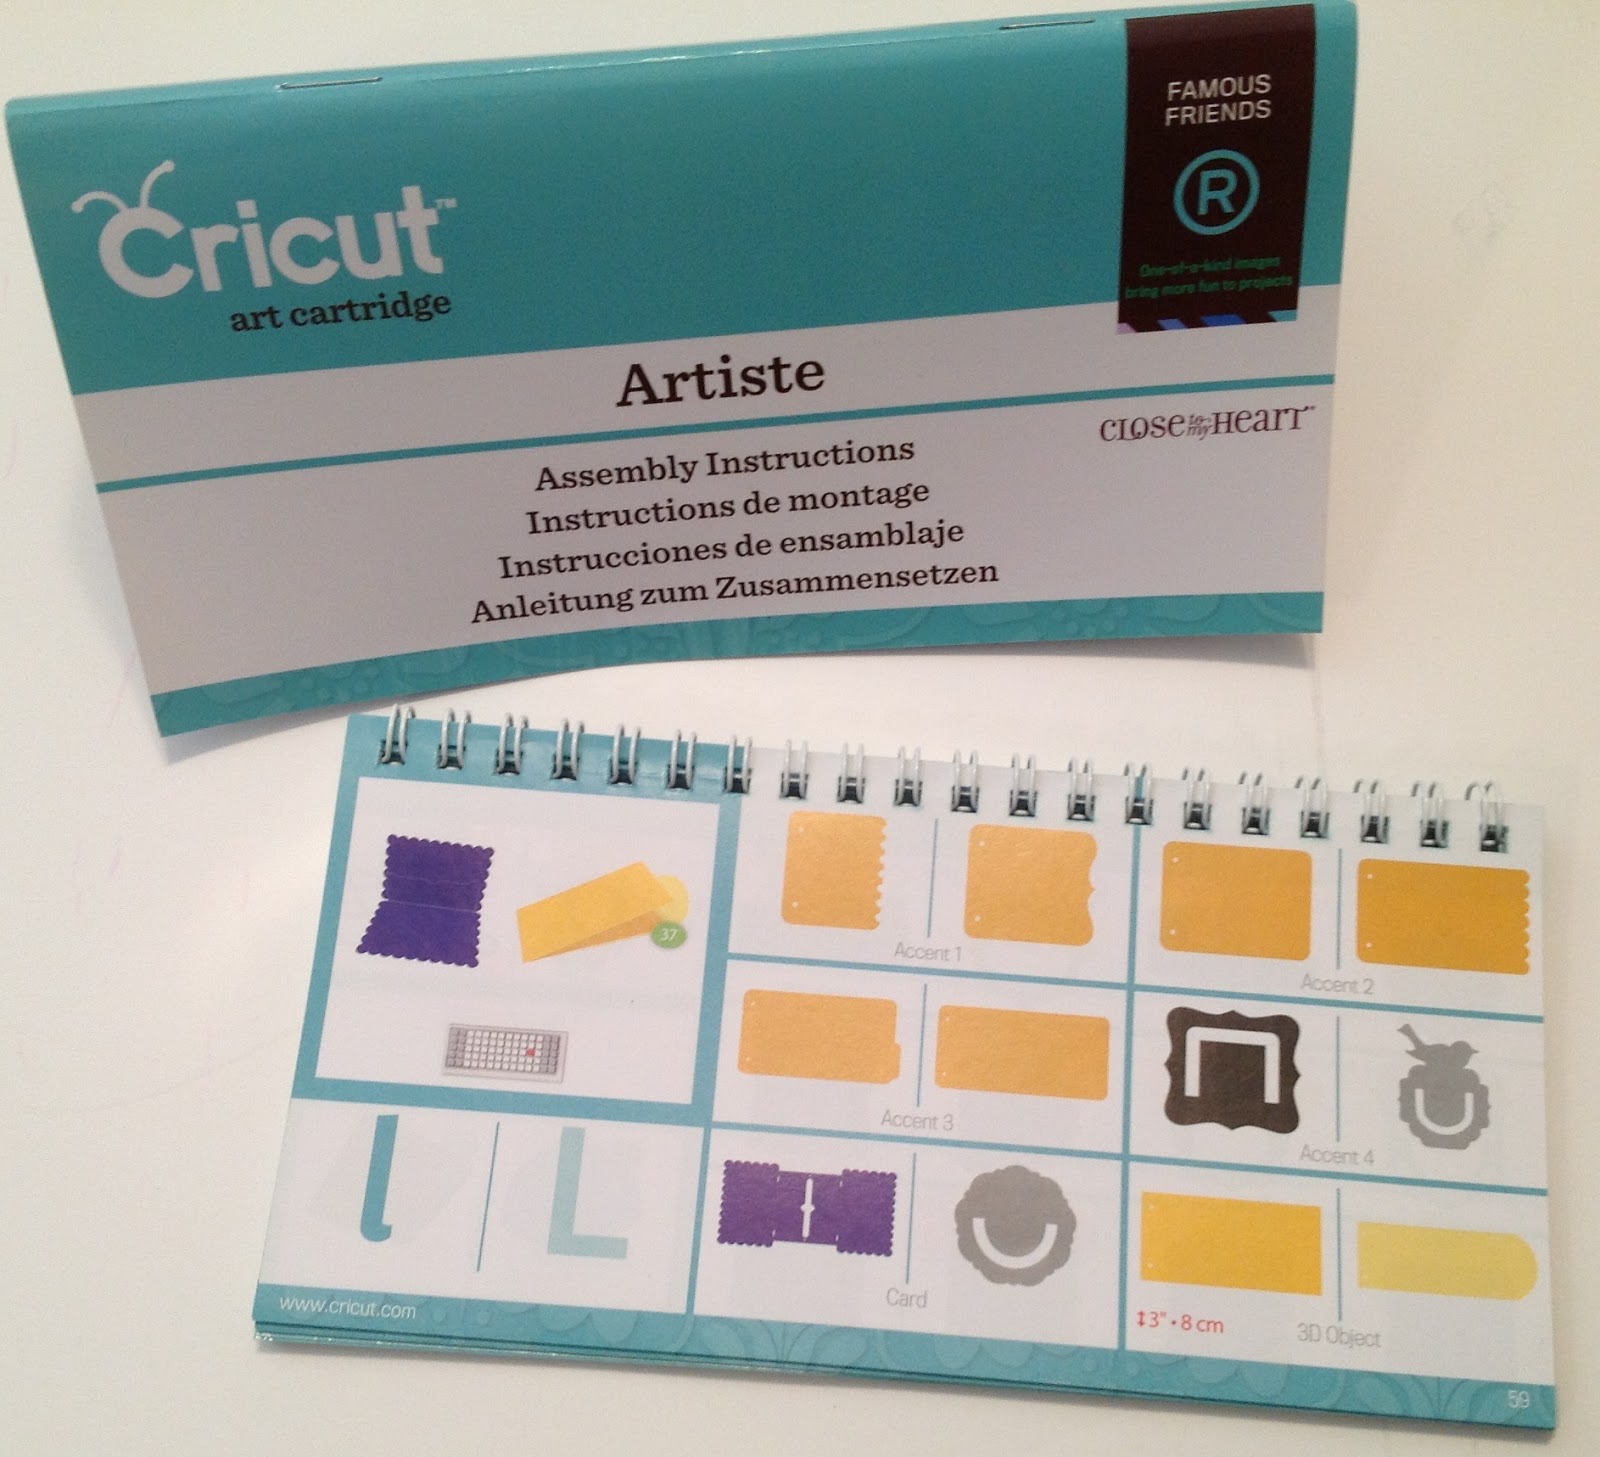
One of my all time favorite Cricut cartridges is the Close to My Heart “Artiste” cartridge. There are so many amazing things you can do with this cartridge. I LOVE all the fun mini albums. It was hard picking but I finally decided to use the mini album on page 59 in the image book/page 37 in assembly instructions. It is recommended you make your mini album no less than 3.8″ tall/wide. I decided to make it an even 4″ to fit my photos a bit better.
1. First thing you want to do when making a mini album with your die cut machine, you want to pick a good quality double sided patterned paper to add some pizzaz to your album. I love the heavy quality of the paper in the amazing Teresa Collins Collections and decided to use the Everyday Moments Collection I had been hoarding 🙂 I just love the blues and yellows in the collection…so fresh and beautiful !
2. Take a few minutes to decide what order you want to use the patterned paper. Don’t forget there is a front and backside so be sure and check to make sure the patterns look nice on both sides together.
3. It’s important to give some thought to which paper you are going to use of the front and back cover of the mini album. Give a little thought to the way you may want to decorate the front cover to give you some idea of what might look best with what you have in mind.
Here I selected the dark blue pattern to be the front and back cover for my book. The bird paper is the B side of the same paper so that becomes the inside of the front and back cover. (and yes, I realized After I cut the paper that I should have made sure to turn the paper on my mat so the inside design was horizontal but it still looks fine to me ).
4. Cut the inside pages according to the diagram in the Cricut manual. I cut all the pages at 4″, same size I cut the cover. As you can see, the pages automatically cut out at the right size without adjusting each page manually to get the graduated sizes of the mini album pages. Cool, right?
5. Layer the inside pages in the recommended order according to the assembly directions on page 37 within the back and front covers. Add book binding rings to hold it together.
6. Now for the fun part…DECORATING THE MINI ALBUM ! One of the great things about using a collection pack is that they generally come with embellishments of some kind that make decorating your mini album super easy ! For this mini book I used the stickers and die cut pieces that were in the collection and a few little embellishment gems from my stash. And my trusty Tim Holtz Tiny Attacher, ATG and some foam pop dots.
7. Start out decorating by selecting which of the embellishments you want to use for the front cover. Nothing is worse than using all your matching embellishments on the inside and running out for the cover…yes, I am speaking from experience 🙂
Here I layered some stickers on the binding edge and across the bottom of the cover. Next I decided to use the circle flower cardstock piece on the rounded flap of the album cover as part of the closure feature. To do that, I adhered it to the rounded flap so that it hangs off the edge as shown towards the center of the front cover. Next, I added the label sticker in the center of the front cover, then layered on top with a foam pop dot the Every Day Moments cardstock piece, placing it so that the Circle Flower piece would tuck under it just slightly to hold the mini album cover together when closed. To finish the cover off I added a rose shaped pearl cachabon to the flower center, a bit of yellow/white twine a the bottom edge and tied some crinkled seam binding ribbon to the top binder ring.
8. Decorate the inside pages using the selected embellishments of your choice. Think about photos you may want to use, add some places for journaling spots along the way and embellish to your hearts content to get the look you want in your mini album.
Here are some pictures of the inside of my album to show off ideas of how to decorate the inside of this particular Cricut mini album. I added the tabs to top of some pages with my tiny attacher stapler, layered stickers and journal spots on others for variety. I like to add in journaling cards mixed in with some of the pages to add more interest to the overall book.
I have photos picked out to put in here to make myself a little reminder book to stop and enjoy the Every Day Moments of my own life. I hope this tutorial inspires you to create your own mini album using some of the amazing shapes found using die cut pages.
If you make a project, I’d love to see it! Please share in our Facebook Group Community where you will find others sharing their projects, tips and inspiration.
One Comment
Very cute! But of course, everything you make is adorable!
Let’s make sure as a member of our community you stay-up-to-date on the latest projects, tips, free SVG files and special deals we share go straight to your inbox!


Very cute! But of course, everything you make is adorable!