

The Post and Photos within may contain Amazon or other affiliate links. If you purchase using links in this post I do earn a small commission but without additional charge to you. Thank you for your support!
There are so many wonderful ways to enhance your die cuts to give them that WOW factor ! Over the course of the next few weeks we will be exploring some of these great tips with you.
Today we are starting with Die Cut Enhancement Tip #1: INKING YOUR DIE CUTS
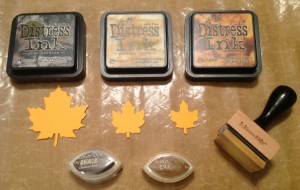
Before you get started: When using ink, I like to have as few basic supplies on hand. 1. A craft mat such as the one made by Inkessentials you can purchase online or at local craft stores. 2. Wet Wipes for cleaning up my hands and my craft mat. 3. Ink and ink applicators.
Using the ink of your choice, highlight areas of your die cut shape by adding ink around the edges of your image. I prefer to use either a Cats Eye Ink pad or a Ranger Distress Pad with applicator for greater control when applying the ink to die cut shapes.
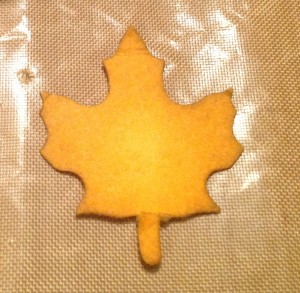
Inking Technique # 1 – You can create shadowing by adding lighter or darker colors to your die images. If you use a distress ink and applicator, lay the die cut image on the mat, ink up the applicators and in circular motions start adding ink to your image. Use your hand or a tool to hold the image in place while you do this.

Here I used the same color of distress ink and the applicator, and just kept layering the color on the die cut leaf until I had created some shadows to the image. Remember, there is no right or wrong here…keep adding ink until YOU like the way it looks.
Inking Technique #2 – You can add more than one color of ink to your image to add even more depth.
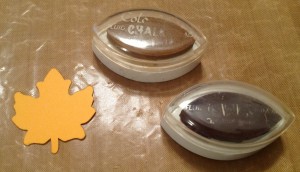
Here I used the Color Box Cats Eye Inks in two different colors. I started with the lighter color to create a shadow, then added the darker brown on the edges.
You can see that by adding two colors you get a much richer look to your die cut image.
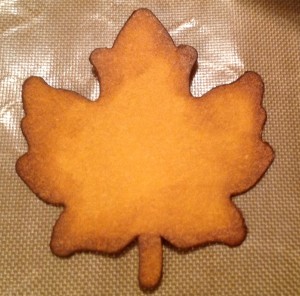
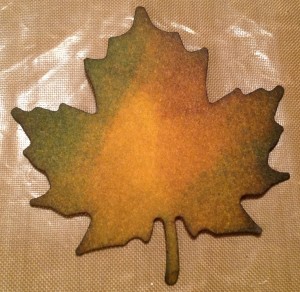
Inking Technique #3 – Don’t be afraid to add even more colors to your die cuts. Here I used three different colors of Distress inks, starting with the lighter brown, then adding the green, then using the darker brown around the edges to get this wonderful layering of colors. You can really get a realistic look on many of your die cut images by using colors that would be found naturally on the real images.
So there you have it, some INKING tips to add some pizzaz to your die cut images. I challenge you to give it a try and see what you like best.
Tip: Practice makes perfect. Cut out a few die cut images out of scrap paper and practice applying ink to it until you get used to this method. Try different types of ink to get the look you prefer.
Stay tuned for other die cut tips soon !
But hey, if are you wanting to learn more Die Cut Tips right now, I created a TOP 10 DIE CUT ENHANCEMENT GUIDE I would love to share with you for FREE. Just Subscribe at Scrap Me Quick Designs to get your own copy for die cut inspiration.

Debbie, great tips and pictures to describe this process! A lot of people are unaware how easy it is to add such dimension to a die cut by simply inking! You’re a great teacher!
Thanks Kristie for your kind words
Very nice! Seeing beautiful leaves in the middle of winter is a good thing. Thanks for sharing your tips. I look forward to seeing more.
Glad you enjoyed seeing the leaves Vi.
Love your tips Debbie and I love distressing my die cuts!!! Your tutorial is wonderful.
Keep checking back Beth as I continue to inspire every one to add more life to their die cuts
What a useful tip!! I never think to use more than one colour when inking a die cut!
Debbie, you did such a great job of showing this kind of enhancement! Such a little thing to do, but such a BIG difference in the end result!