

The Post and Photos within may contain Amazon or other affiliate links. If you purchase using links in this post I do earn a small commission but without additional charge to you. Thank you for your support!
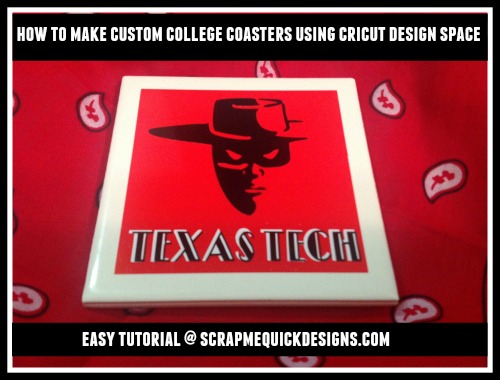
Today is Day Four of Time to Create for the Graduate Using Design Space. Today we are making Custom Coasters for our graduate using their college mascots or university emblem. Way cool and something different for your graduate to receive. This is one of my often requested gifts from the graduate. While I don’t use the Graduation Category in Design Space this time, I do use other features in Design Space to create these. By the way, if you missed the other days of this series – Day 1: Cards, Day 2: Money Box, Day 3: Thank You Card Sets just click those links to see the post for more Celebrate the Graduate projects. Now lets get started so you can make your own custom coasters too.
Custom College Coasters
Custom Coaster Tutorial:
1. Create a cut file of the college image you want to use. You can take any jpg image of a your graduates College Mascot, University Emblem, etc and using the UPLOAD IMAGES feature of Design Space make it a cut file to use. I recommend doing a Google Image search to find images to use. I have a video that shows you how to use the upload feature to create your cut image that I recommend you watch. Its not the image I use for this coaster but its the same way to do it.
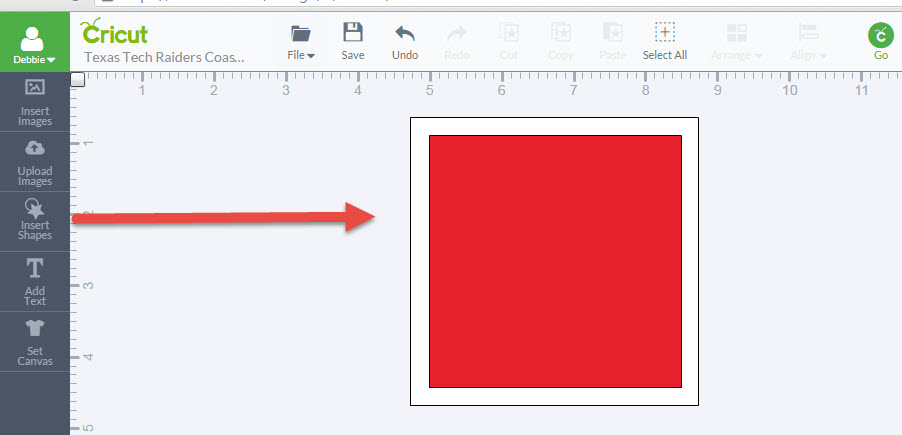
2. In Design Space, I create a 4″X4″ square using the new Insert Shapes feature. The 4″X4″ shape represents the ceramic tile I will use for the coaster base so I can size everything to fit easily.

3. Add a 3.75″ X 3.75″ square using the new Insert Shape feature. This will actually be vinyl that I cut out to add color to my collage coaster image. Note: Depending on the image you are re-creating you may not need to do this step.
4. Now add the College Uploaded Image shape you created in step one to your design space mat.
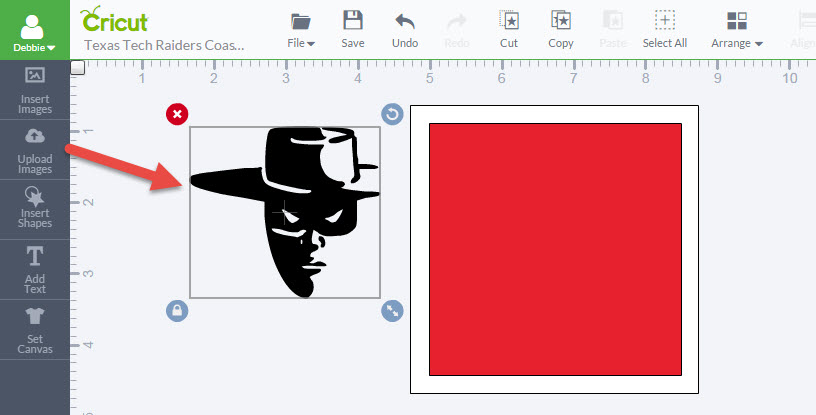
5. Next add any Text you want to add to your coaster using the Text Feature. Select a font that fits your college. Note: Depending on your college coaster design you may not need this step. Since I was using an image of just the mascot, I wanted to add the college name to the coaster too.
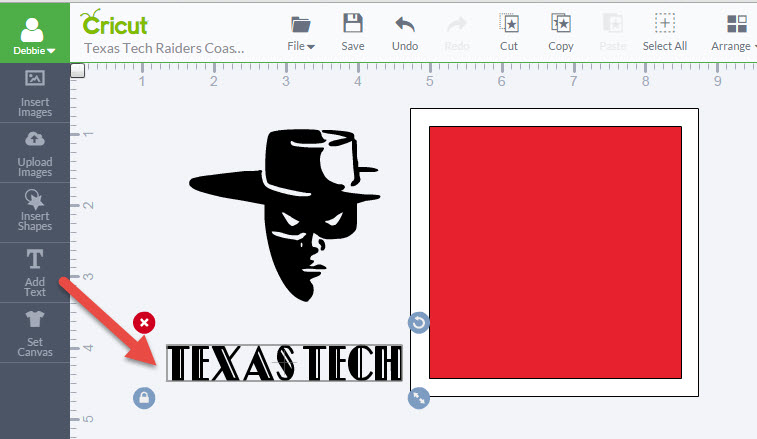
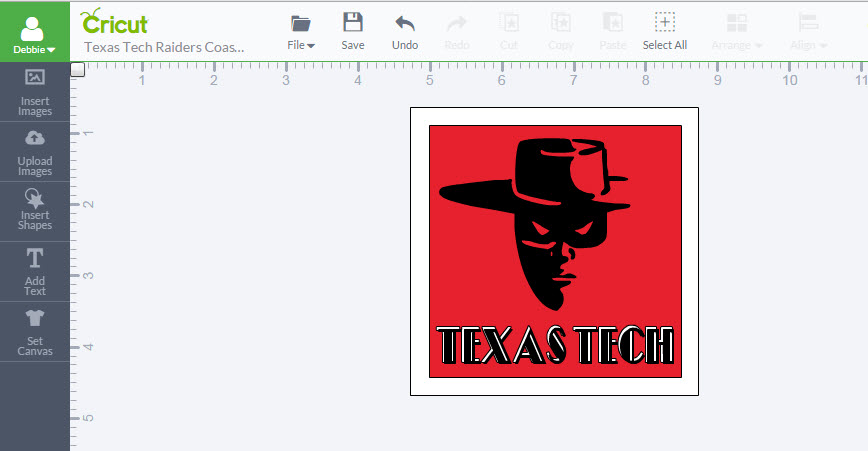
6. Now size the images to fit within your coaster shape. You will need to use the Arrange feature on the top menu to get these added shapes to layer on the coaster shape in the order you want. Note: For my coaster design, the red square, raider image and the text will be cut out of vinyl to be placed on the white ceramic coaster. I just unselect the white square when I send the project to cut.
7. Now that I have the coaster designed, I cut the vinyl out. To make coasters I always use Oracle 651 outdoor vinyl. It adheres well, is permanent once is cures and can withstand moisture and heat from glasses and mugs. You will need to “weed” the part of the vinyl you don’t want to use away from your image. I like to use the Cricut Weeding Tool (hook tool).
8. With my vinyl cut out and images weeded, I am ready to apply to the coaster. Watch the video to see how I apply the vinyl and other tips I share.
Now, wasn’t that fun and easy to make for your graduate ? Everyone I give coasters too loves them because they are unique…no one else will have the same coaster. And with all the tips I shared, I hope you find these inspiring and easy to make for any occasion. Come back tomorrow for Day 5 in the series where we explore making custom gift packaging using shapes in the Design Space Graduation Category. If you enjoyed the videos, be sure and sign up for My You Tube Channel so you don’t miss any future videos on using Design Space. And of course, feel free to share links to any of my videos to help others. See you again tomorrow.
If you make a project, I’d love to see it! Please share in our Facebook Group Community where you will find others sharing their projects, tips and inspiration.
One Comment